Monday, October 17, 2005

Autumn leaves


Autumn leaves…

Autumn is in its glory here in southern Wisconsin, and before they shut down for the winter, the trees are giving us one last gift…their beautiful, bright, iridescent leaves.

Alex, my last little preschooler, has been accompanying me on my leaf gathering forays. His joy and enthusiasm is contagious, and it warms my heart to see that he too is developing a love for God’s creation. I remember when my three children were really young (I had them 14 months apart from each other) - they seemed so demanding, so needy, so totally consuming of every ounce of my energy. I wondered if they would ever want to spend time with me doing the kind of things I enjoy, like walking through a meadow, or the forest, drinking in the beauty of creation, and of course examining each and every plant, flower, or leaf we come upon.

My husband repeatedly assured me that whatever he and I had a passion for, our kids would most likely develop a passion for as well. He was right! Each one of my three children are showing a love and appreciation for the world around them, and although they might not be quite as crazy about flowers and leaves as I am, they display a remarkable tolerance for my passion, and eagerly bring me their own plant discoveries.

Autumn is such a fleeting season, please try to get out there soon, before it fades away, and drink in the color, the sweet earthy scent of fallen leaves, and the tangy cool breeze. And, grab a child or two, and take them with you, so they too can learn to appreciate the beauty all around us.

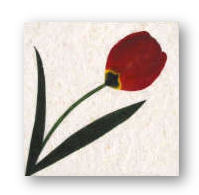
“the beauty of each blossom (and leaf) speaks silently of God’s love…”

If you don’t have time to make your own, Autumn Leaf Cards are now available on my website.

Thursday, September 29, 2005

Quick! Use your herbs!


It’s time to make the most of your herbs, before the first frost. In Wisconsin we’ve been blessed with a warm autumn so far, but that can change on a dime. The easiest and one of the most rewarding things you can do with your herbs is to make herb butter. Come January, when your beautiful, fragrant herb garden is just a fleeting memory, you’ll be thankful you did.

To make herb butter, start with softened butter. I tend to add approximately ¼ cup of chopped herbs per stick of butter. You can use a single herb (just chives or basil for instance) or make compound butters, such as an Italian blend (oregano, basil, and a touch of rosemary). Check your own spice blend jars for ideas. For extra sparkle, add a bit of lemon zest to your herbs, or freshly cracked pepper. After you’ve made a wonderful array of herb butters, place them on plastic wrap, form into fairly thin logs, and freeze. You will be able to easily slice off what you need, and pop it back into the freezer.

I use my herb butters on steamed or microwaved vegetables, on baked fish, in sauces, or for sautéing. I also make “gourmet” herb butters, using special fresh European butters, exclusively for my home baked sourdough bread. Irresistible!

Thursday, September 22, 2005

A Favorite Blog


A Favorite Blog

It seems these days that everyone and their sister are publishing blogs…isn’t it fascinating? My favorite is Loreen’s Blog. She is a pressed flower artist/hydrologist/university professor/poet/gifted writer/soon to be author/Phd student…just to mention a few of her more interesting hats, who hails from Zimbabwe. I enjoy reading about her thoughts on life in general, her reflections on scripture, as well as her quest for a driver’s license. (She’s taken the test more times than I can count, but has yet to pass. They want a bribe, but she stands on principle).

Check out her blog. I’m quite sure you’ll enjoy her lively writing, her energy and insights.

Thursday, June 16, 2005

How to Press Flowers volume 2


Hi Readers!

It’s definitely time for an update.

We are in early summer here in Twin Lakes, Wisconsin, and it is beautiful. My perennials and annuals are blooming, and the wildflower seeds I planted earlier along the cornfield are beginning to pop as well, so as you can imagine I’ve been very busy pressing. It has been a joy!

Here are some more pressed flower tips I want to share with you.

*I usually press the flowers I gather right away, but sometimes I let certain flowers sit on the counter for awhile, such as carpet cosmos, poppies, and even pansies. I gently flatten them out, and arrange the petals as needed, but then I let them sit for a few hours, and they kind of “draw in a bit.” This tends to concentrate the color of the flowers, and it adds a bit of interesting texture. Try it, and see what you think.

*A number of you have written in asking me what kind of glue I use on pressed flowers. To be honest, I’ve tried a number of botanical and expensive specialty glues, but I’ve always come back to plain old Elmer’s Glue. You know, the plain white glue we used in grade school as kids. Actually, I tend to use the small kid’s size bottle, which has a nice tip making it easy to direct the flow of the glue, and the small size fits easily in my hand.

*Pansies are a favorite for pressed flower artists, but they can be tricky to glue properly. Here’s how I glue them: First, place a small drop of glue in the center of the flower, and place a row of small dots of glue along the outer edge of the flower. Arrange the pansy where you want it and press down. Then take a tooth pick and gently run it under the overlapping petals of the pansy from the middle out. See how loose they are? Place a tiny drop of glue on the end of the toothpick, and gently slide it under the unsecured parts of the overlapping petals. Press down, and now you won’t have to worry about them curling up sometime later.

That’s all for now. Keep your questions coming, and I’ll address them as soon as I can. Keep pressing!

Saturday, May 7, 2005

Herbs - An Introduction


Herbs have an endearing way of becoming an obsession when given half a chance. Once you start learning about them and begin using them you’ll become hooked! They are a delight to touch, see, smell, and especially taste. They really become part of your life.

I am by no means an expert on herbs, but they are a passion of mine, and I’ve learned to incorporate them into my life in many ways, especially in the kitchen. I’ve also gotten a number of friends and family hooked on them, and am happy to share with you what I’ve learned.

I first became aware of herbs (really aware) of herbs when I was a student at the University of Wisconsin in Madison. Many Saturday mornings, from May-October, my friends and I would trek down to the Capitol Square where one of the nation’s biggest Farmer’s Markets is held. If you ever get a chance to go, please do so – it’s terrific. Anyways, one of the “regulars” sold their homemade pesto each week, which my most of my friends and I just loved. (They had free samples) What is pesto, you ask? It is a mouthwatering condiment made typically from fresh basil leaves, with olive oil, parmesan cheese, a bit of garlic, and usually pine nuts or walnuts. It’s terrific on pasta, bruschetta, fish, chicken, and on toasted pita as a dip, etc, but I digress. What I really want you to know is that this was my first introduction to basil, and once I learned that basil was a plant that actually grew in Wisconsin, I knew I had to get some.

I’m not Martha. Can I really grow herbs?
Yes!
Let me tell you some good news…herbs are simple to grow! They really are. They thrive in average soil; they love sun, and don’t need intense watering. Most herbs hail from the Mediterranean, and so they are used to intermittent showers, sunny days, and fairly thin soil. As long as you plant them in an area of adequate sun, they will thrive with minimal fuss. However, make sure your soil isn’t heavy (i.e. full of clay) because they don’t like to sit in soggy soil – they need decent drainage. Herbs also do remarkably well in containers! I will write more about my favorite herb container combinations later.

Where should I put my Herb Garden?

Please put your herb garden, or containers of herbs, as close to your kitchen as possible. This sounds simplistic, but it is true, and essential, if you are going to actually use the herbs, and make them a part of your life. My herb garden is right off my patio, and I can step right outside my patio door, grab a handful of delectable herbs, and leap back inside in less than 5 seconds. Because they are with in easy reach, I use my herbs on dark and stormy days, not just on beautiful bright days when I feel like strolling about the garden. If you can’t locate a garden conveniently close by to your kitchen, please consider planting a container of herbs near your kitchen door, with some of the essential every-day herbs such as parsley, chives, oregano, etc.

I'll write about my favorited ways to use herbs soon. Right now, I need to get busy planting the new herbs I just bought!

Tuesday, April 26, 2005

The Gift of Encouragement


“A word aptly spoken is like apples of gold in settings of silver.” Proverbs 25:11

What is one of the single most powerful tools you possess that can have a lasting impact on another human being?

The gift of encouragement.

A short note of encouragement can have a powerful effect on others…A word of appreciation can send forth ripples of impact that last a lifetime. Anyone is a candidate for an encouraging note. One of the natural outcomes of my pressed flower card business was actually using the cards, and I've gradually become very interested in the art of ecouragement.

At first thought, it may seem that writing a note to someone is hard, and sometimes it can be. But, keep in mind that our words don’t have to be polished, or breathtakingly eloquent. Simple, heartfelt words will go the distance, and span the gap from your heart, to theirs.

One of the best notes of encouragement I ever received was during my sophomore year of college. I attended the University of Wisconsin-Madison, and one snowy day I was working in the mailroom of the Plant Pathology department, cold and damp from biking to campus in the snow, dreading upcoming exams, and wondering where I really fit in this world. As I was sorting through the mail, putting each envelope onto the appropriate faculty mailbox, I was stunned to find that one of the envelopes was addressed to me! I opened it up, and on the inside of a dime store card were the simple words, “Liz, I like you!” It was signed by an older woman who was one of the department secretaries, whom I assumed never even knew I existed. That simple, totally unexpected note made my miserable day! That simple note had the power to lift me beyond my present circumstances – something I hadn’t been able to do myself.

These days, in the age of instant messaging and e-mail, just the effort of obtaining a card, addressing the envelope, and putting a stamp on it, speaks volumes. Only a few heartfelt words are needed for a truly encouraging note.

Here are some ideas to get you started on your quest to becoming an encourager:

*Commit a random act of kindness, by simply letting someone know you appreciate them

*Encourage someone after a difficult loss is perhaps the most challenging kind of note to write, but say a prayer and do your best. Your efforts will give the recipient something to keep, share, and re-read, in other words, you will be blessing them with lasting encouragement, to get them through the difficult days ahead.

Here’s a challenge for you – it’s actually a challenge I received from a godly friend years ago: send one note of encouragement a week. Just think of the positive impact you can have in this world, by encouraging 52 other people this year! I must admit that I haven’t been able to keep up that pace, so I have revised this goal to a monthly one. On the first of every month, I select one of my pressed flower cards, and send it off. And you know, nine times out of ten, I end up receiving encouragement from those I try to encourage! What a blessing, from so little effort.

”Therefore encourage one another and build each other up…”1Thessalonians 5:11

Friday, April 22, 2005

How to Press Flowers volume 1


Welcome to my first Blog entry.

I've been thinking of doing a blog for quite some time, but must admit I had been dragging my feet. I'm not the most dynamic writer in the world - my writings and musings don't have the "snap, crackle, and pop" that so many bloggers have, but for the sake of SEO, (search engine optimimization), I'm jumping in. Besides, I've got things to say!

I plan on touching on an array of topics, including pressed flowers and handmade paper, of course, but also using herbs (another passion of mine), running a home business/website, incorporating more of God in my life, and what ever else comes to mind that I think may be of interest to the viewers of my website. Please come by every so often!

I'm going to begin with one of my passions - you guessed it...Pressed Flowers!

Pressing Flowers

There is a wealth of information on the web about pressing flowers on the web - (see my Pressed Flower Links for a number of my favorite pressed flower sites), but I want to give you some of my tried and true tips for you pressed flower enthusiasts out there.

* My most used press - I love the "Microfluer". This press is a microwave press, essentially two thick pieces of plastic grid, 4 clips, and thick fleece liners. I use this press the most, because it's so FAST and easy. I can press about 15-20 decent sized pansies in about a minute. The color is exceptional - often the color seems richer after the microwaving, but there are a few flowers that turn strange colors, or don't tolerate the microvave at all. Also, the timing can be tricky, i.e. how long to zap the flowers, but it just takes some patient trial and error. Please practice on some "not so perfect" flowers first.

* Gently flatten the flowers - before placing them in your press. That way they have a better chance of pressing perfectly.

* Don't forget the leaves! - it's easy to get so carried away while gathering flowers, that you forget to snip a few leaves and stems. Find young fresh leaves, they press best. Also, if the stems of a certain flower are thick and bulky, substitute a more slender stem from another flower.

* Cultivate a sense of wonder - Take a moment to look...really, really, look at a flower. See the intircate handiwork of each flower - the precise symetry, the irridescent glowing colors on such a tender canvas. How kind of our Creator to sprinkle such beauty at our feet!

* Cultivate a sense of humor - I try to gently knock the bugs off each flower I gather, but those little pests are persistant! Can you believe God made so many odd looking bugs? I try to be patient and carry those little bugs back outside, but after the millionth one..

* A few of my favorite flowers to press - Cosmos, osperspermum, pansey, viola, violet, verbena, coreopsis (there's a new coresopsis hybrid called "Heaven's Gate" that I can't wait to try), calendula, transcantia, borage, edelweiss, mallow, lavender, etc. There are more, which I will add at a later date, but the flowers listed here are easy to press, and retain their color well.

If you haven't pressed flowers before, please try it! If you have any questions, just e-mail me. I'd be happy to help get you started!


My Blog List

Term of Use

Flora and Flowers Copyright © 2009 Flower Garden is Designed by Ipietoon for Tadpole's Notez Flower Image by Dapino | Blogger Styles | Best Credit Card Offers